The Benefits of Using Light Metering

Incident vs. Reflected
Incident Metering
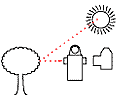
Because incident metering reads the intensity of light falling on the subject, it provides readings that will create accurate and consistent rendition of the subject’s tonality, color, and contrasts regardless of reflectance, background color, brightness, or subject textures. Subjects that appear lighter than middle gray to your eye will appear lighter in the finished image. Subjects that are darker than middle gray will appear darker. Colors will be rendered accurately and highlight and shadow areas will fall naturally into place. Neat trick, eh?


White Plate


Gray Plate


Black Plate
Reflected Metering
Because reflected metering reads the intensity of light reflecting off of the subject, it is easily fooled by variances in tonality, color, contrast, background brightness, surface textures, and shape. What you see is often not at all what you get. Reflected meters do a good job of reading the amount of light bouncing off of a subject—the trouble is they don’t take into account any other factors in the scene. They are merciless in recording all things as a medium tone.
Reflected measurements of any single tone area, for instance, will result in a neutral gray rendition of that object. Subjects that appear lighter than gray (like a white cat) will reflect excess light, causing them to record darker than they appear. Subjects that are darker than gray (like a black cat) will reflect less light and produce an exposure that renders them lighter—in other words, a gray cat instead of a black one.
White Plate


Gray Plate


Black Plate


Benefits of Incident
In order to accurately record any scene, whether it’s a person’s face, a piece of jewelry, or a landscape, you have to measure the amount of light that exists in a scene. There are two basic methods for measuring light: You can either take a reflected reading by measuring the light reflecting off of your subject, or you can take an incident reading by measuring the light as it falls on the subject. Both types of metering can produce precise exposures if you know how to interpret the data that your meter supplies. Many Sekonic meters give you both metering options—along with some sophisticated features not found in even the most advanced cameras with built-in meters.
The Neutral Gray Standard
All light meters, regardless of the type, are designed to measure light in a consistent way. Light meters presume all subjects are of average reflectance, or a neutral gray—often called “middle” gray because it falls in the middle of the zones between pure black and pure white. In the Zone system of exposure, this middle gray is known as Zone V. The use of the neutral gray standard allows a reflected light meter to render correct readings for “average” subjects in “average” lighting situations. Light meters, however, can’t see subjects and interpret them the way you can—they measure only one thing: the intensity of light. That's fine if you’re photographing a medium gray man in a medium gray suit on an average day, but not entirely accurate in other situations.
Using Reflected Measurement
Handheld reflected light meters (including built-in camera meters) read the intensity of light reflecting off the subject. Because they measure the light after it hits the subject, however, they are affected by the reflectance of the subject’s surfaces. And because most reflected readings are taken from the camera position, they generally take in a wide area that can include many different reflective surfaces or colors that can bias the meter reading. If you’re photographing a person walking on a sandy beach on a bright day, for instance, the light reflecting off of the sand will overwhelm the reading and result in an underexposed image of the person.
A reflected meter will provide different readings for, say, a white cat and a black cat—but it will provide an exposure that records both as the same middle gray. Similarly, a pristine fresh-fallen snow and a black coal field will be recorded as the same color: medium gray. A reflected meter will also record a red apple and a green apple as the same tone—even though in reality they reflect vastly different amounts of light. You can improve the accuracy of your reflected readings by placing an 18% neutral gray test card in front of the important subject areas, but that’s not always practical.

Advantages of Incident Meters
A better alternative to reading the light in many scenes is to use an “incident” meter. Handheld incident meters read the intensity of light falling on the subject and are usually taken from the subject position. Because they are not affected by variances in subject color or reflectance, incident meters accurately record the amount of light falling on the subject. In the majority of situations, an incident reading is extremely accurate and records tones, colors, and values correctly.
Spot metering an 18% gray midtone area allows you to make an exposure that will record detail, tonality, and color accurately. Once you get accustomed to “reading” scenes, you’ll be able to tell which subject areas have an “average” reflectance, and even in the most contrasty situations, you’ll be able to take spot readings from critical areas. For example, by taking a spot reading of a tall, green saguaro cactus (a medium-toned subject) in the middle of a bright, sandy desert, you’ll get an accurate reading of the important subject area. Spot meters also allow you to average readings from several brightness areas within a scene.

In-Camera Spot Meters vs. Handheld Meters
Although a number of advanced SLRs offer spot-metering capability, the metering angle is directly related to the focal length of the camera lens in use. Every time the lens is changed, the effective spot-meter angle changes. With a normal lens in use, the spot-metering angle may be 15 degrees or more. A handheld 1-degree spot meter, on the other hand, allows the most selective measurement of distant subjects and small areas in complex scenes.
