Common Metering Mistakes
So you metered your scene and checked your settings twice, but the shot just isn't coming out right. Jim Zuckerman explains how to avoid seven common metering mistakes.
I have been teaching photography for a long time, and I’ve realized that the most challenging aspect of taking pictures for most people, amateur and pro alike, is metering a scene accurately.
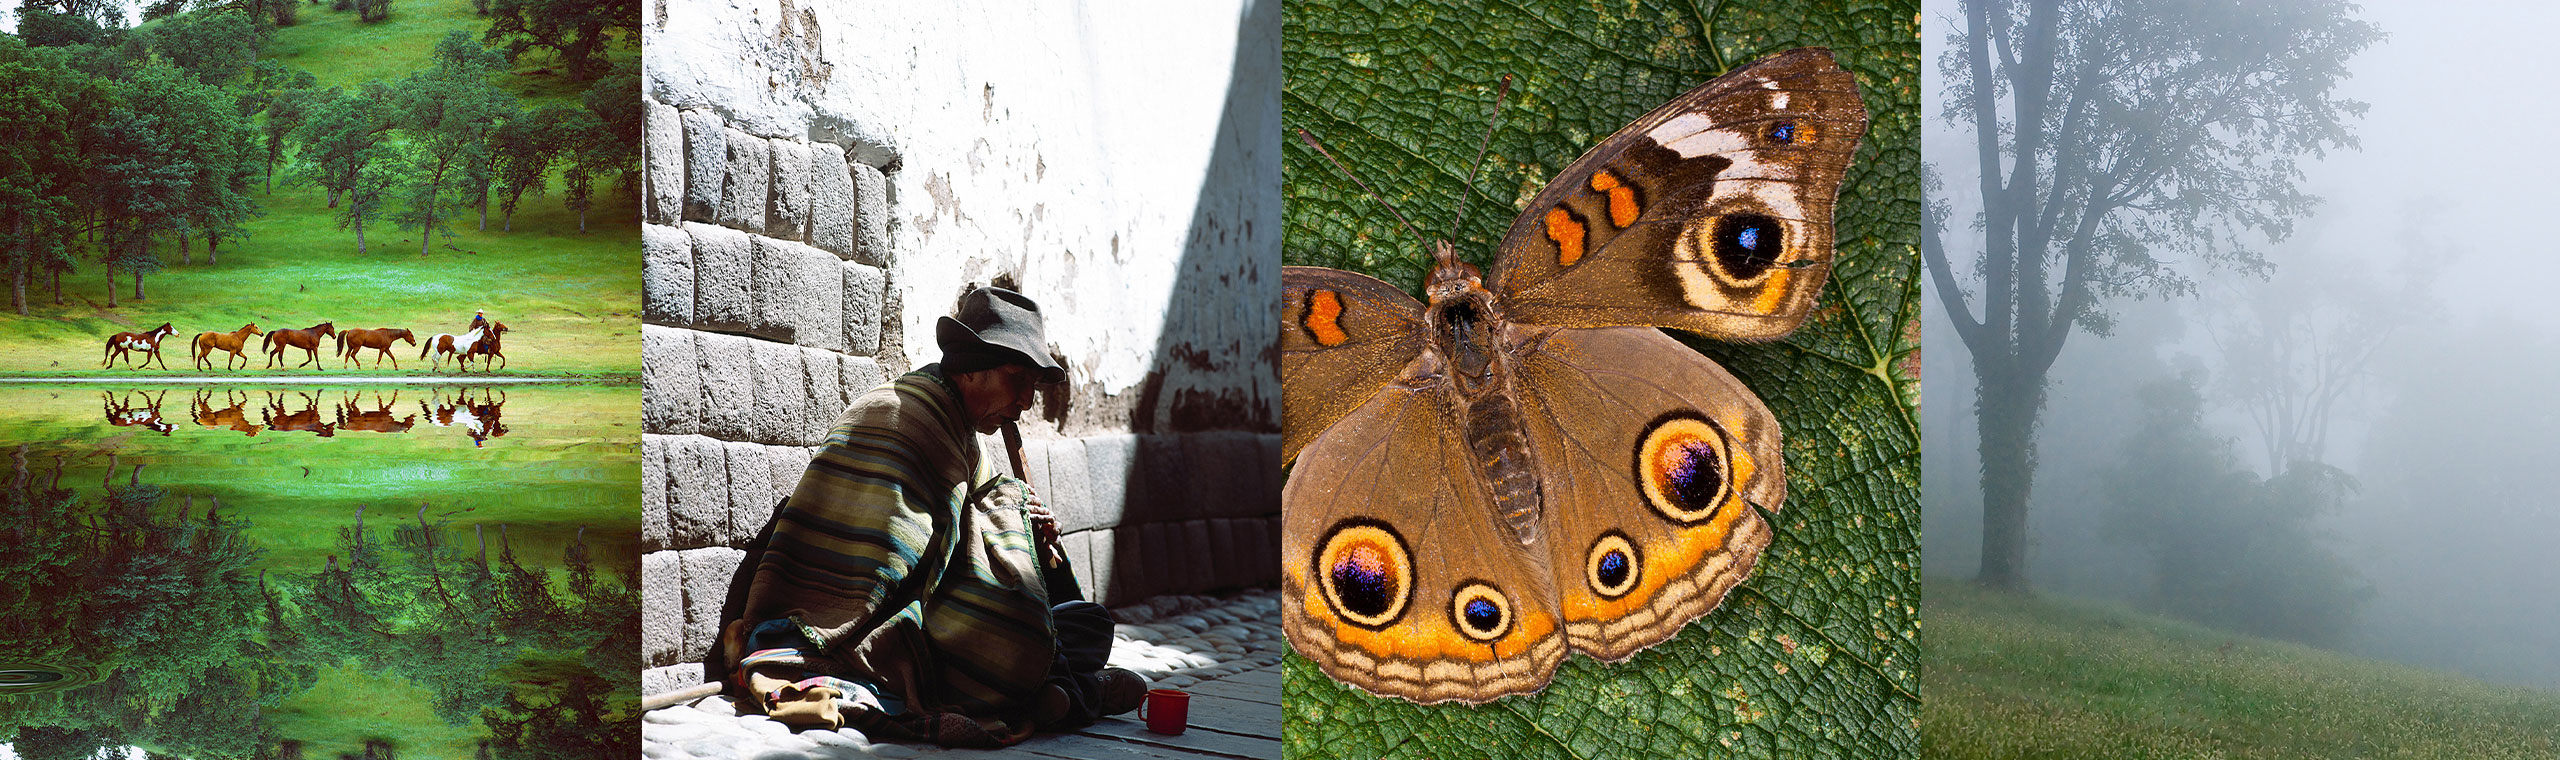
If you are shooting a subject that is primarily middle toned, such as the Western scene in image 1 or the buckeye butterfly in image 2, your meter will be consistently accurate. However, there are many situations in which photographers get unexpectedly poor results. I’ll identify seven of those situations here, in the hope that it will help you avoid all-too-common pitfalls.

Image 1

Image 2
Overexposing the Moon
When you photograph the moon in a dark sky, a meter that reads the lunar surface as well as the night sky will give you a reading that makes the composition middle toned. In trying to lighten the sky to gray, it completely overexposes the moon. The solution? Use the 1-degree spot mode feature on a handheld meter to read just the moon, minus the sky. That will give you a middle-toned moon. If you want it to appear lighter in the picture, add 2/3 or one full f-stop of exposure, depending on your taste. In image 3, I tweaked the exposure by + 2/3 f-stop.
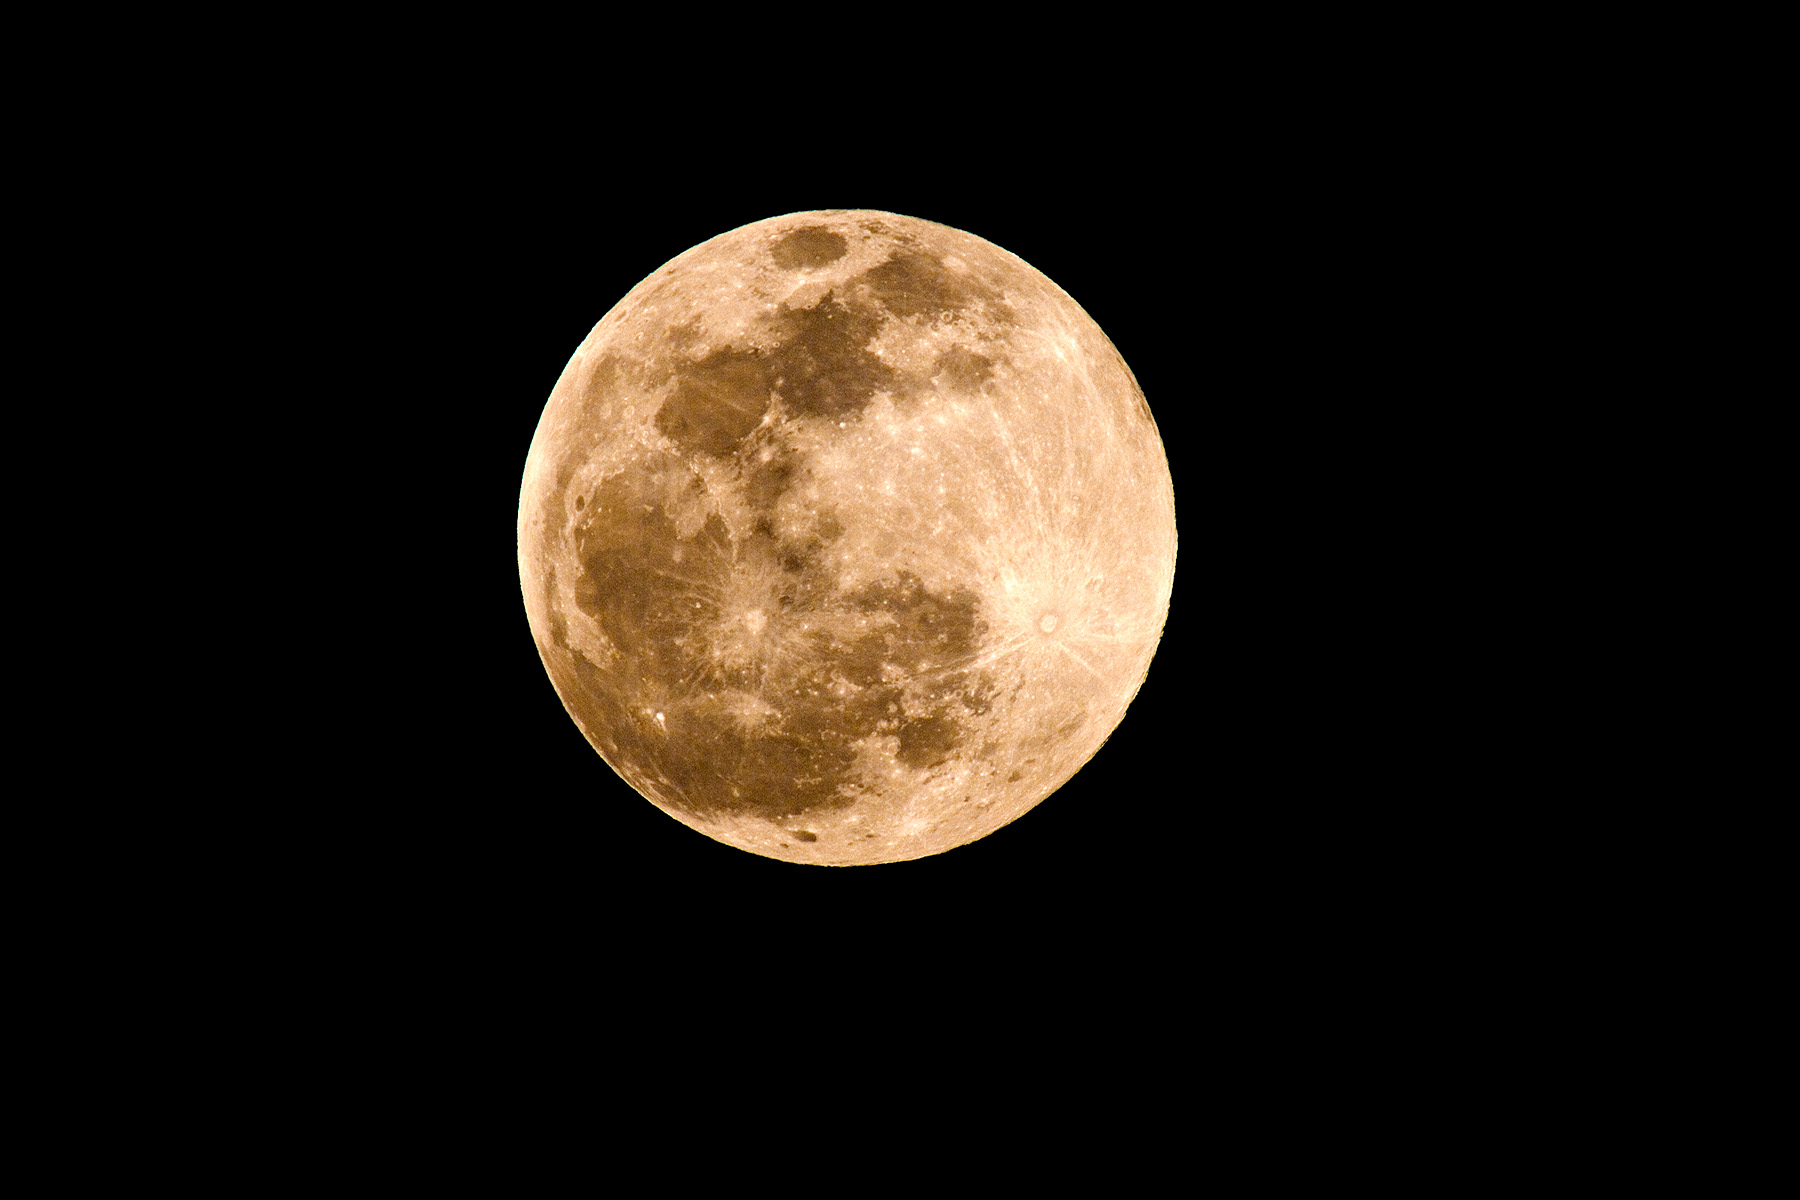
Image 3
A Bright Sky with a Darker Landscape
There are many times when you are shooting landscapes or cityscapes and the sky is fairly bright while earth-bound subjects are quite a bit darker. The picture of Prague, image 4, is an example. The built-in meter was influenced by the bright sky, and the bottom portion of the picture was therefore underexposed. In this case, even good metering technique won’t help, simply because the contrast is too much for the sensor to handle. The way around this problem is to 1) use a graduated neutral density filter to darken the sky and bring its exposure value closer to that of the bottom portion of the image, 2) create a high dynamic range (HDR) image that incorporates several frames with a range of exposures, or 3) capture your image in a raw image file format and use the controls available in raw image processing software such as in Adobe Camera Raw or Lightroom to darken the sky and lighten the landscape. For the last option to work, you’ll need to ensure that you don’t completely overexpose the sky, so that it blows out to white. If the image data isn’t available in the file, no raw processing software will be able to make it appear.
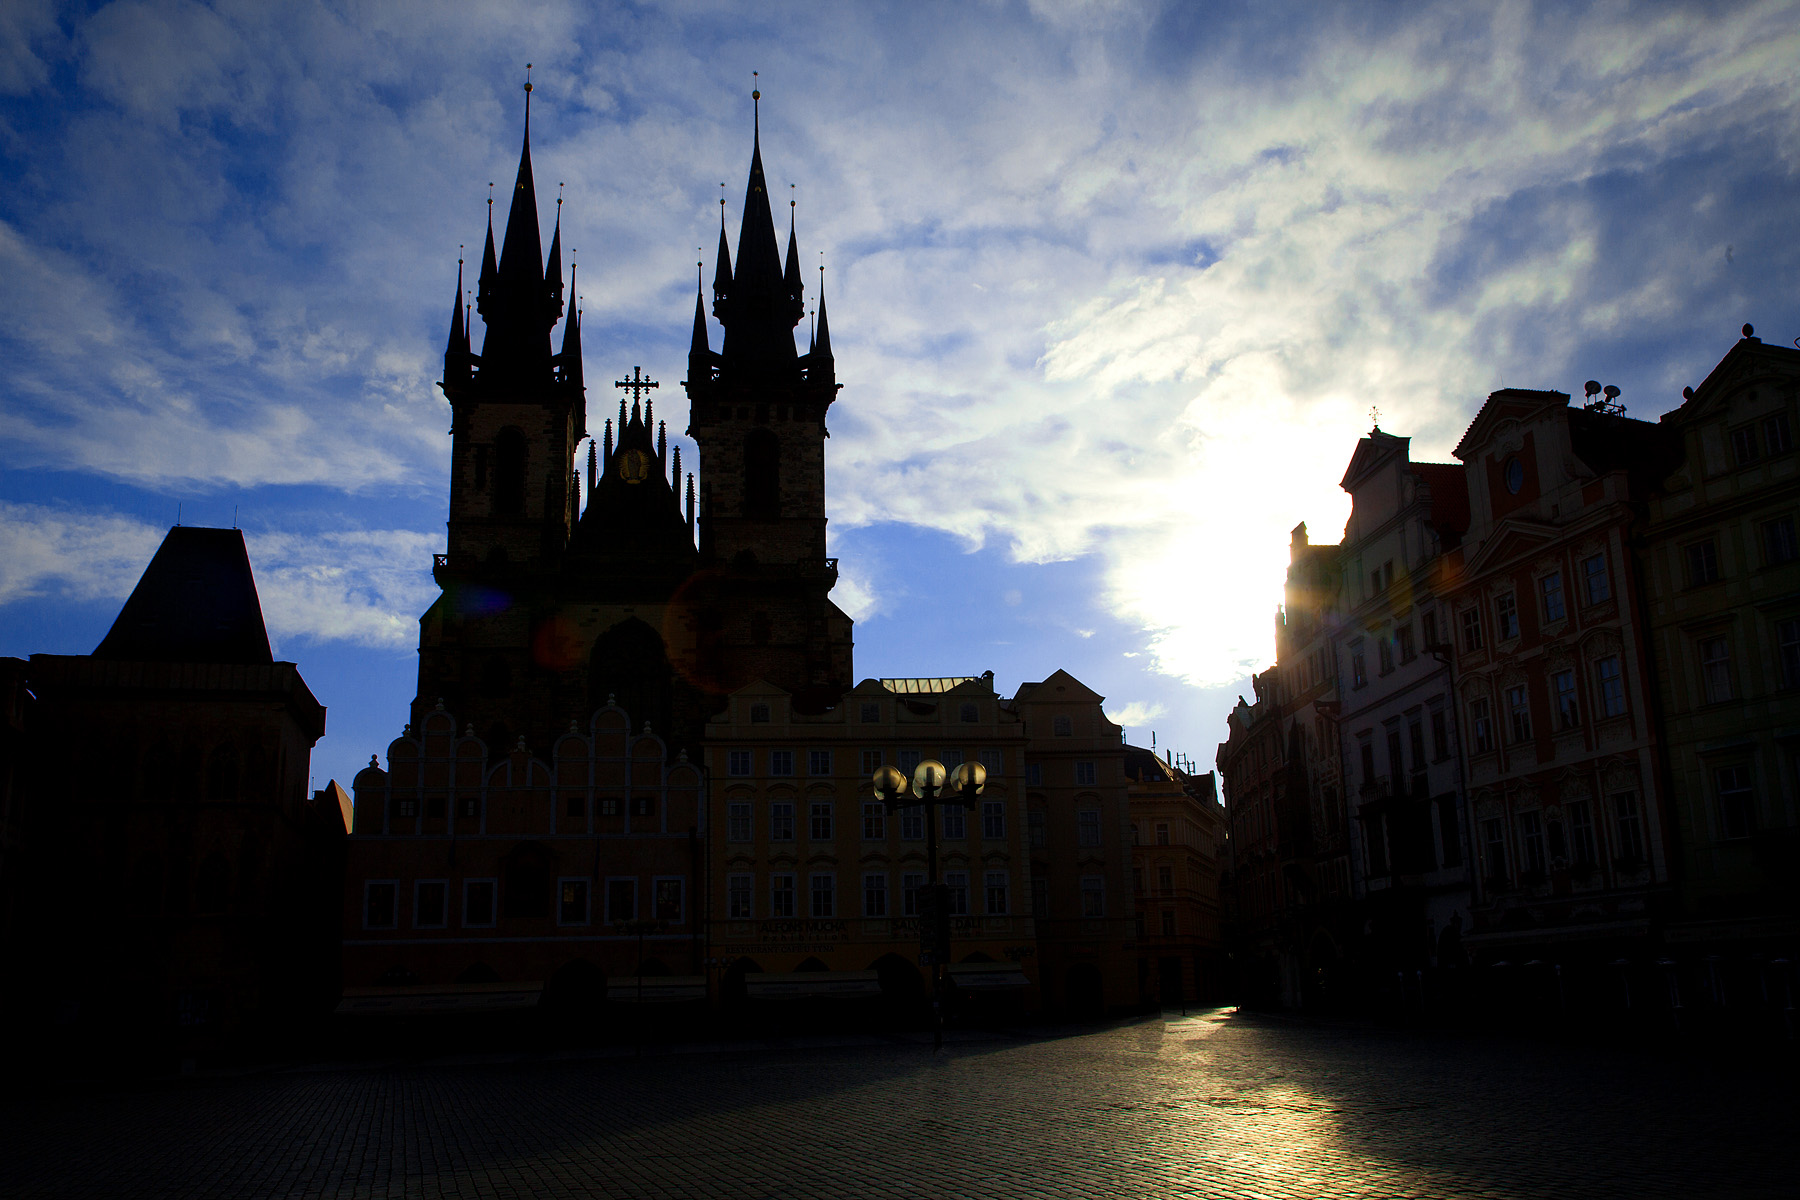 Image 4
Bright Windows
When you photograph a person, a pet, a vase of flowers, or any other subject in front of a bright window, a built-in camera meter will be influenced by the outside daylight. In an attempt to make the image middle toned on average, the meter will give you a reading that underexposes the subject so much that it becomes a silhouette.
To get the kind of picture you want, use a handheld spot meter from the camera position. Take a reading on the subject itself with the narrow 1-degree angle capability of the meter, thus eliminating the influence of the daylight. This will give you a perfect exposure, like the one you can see in image 5. Detail outside must be sacrificed (unless you use HDR or fill flash). However, as you can see in my example taken in Agra, India, outside detail isn’t always necessary. In fact, had the scene outdoors in that shot been correctly exposed, I think it would have distracted viewers from the model and the architecture.
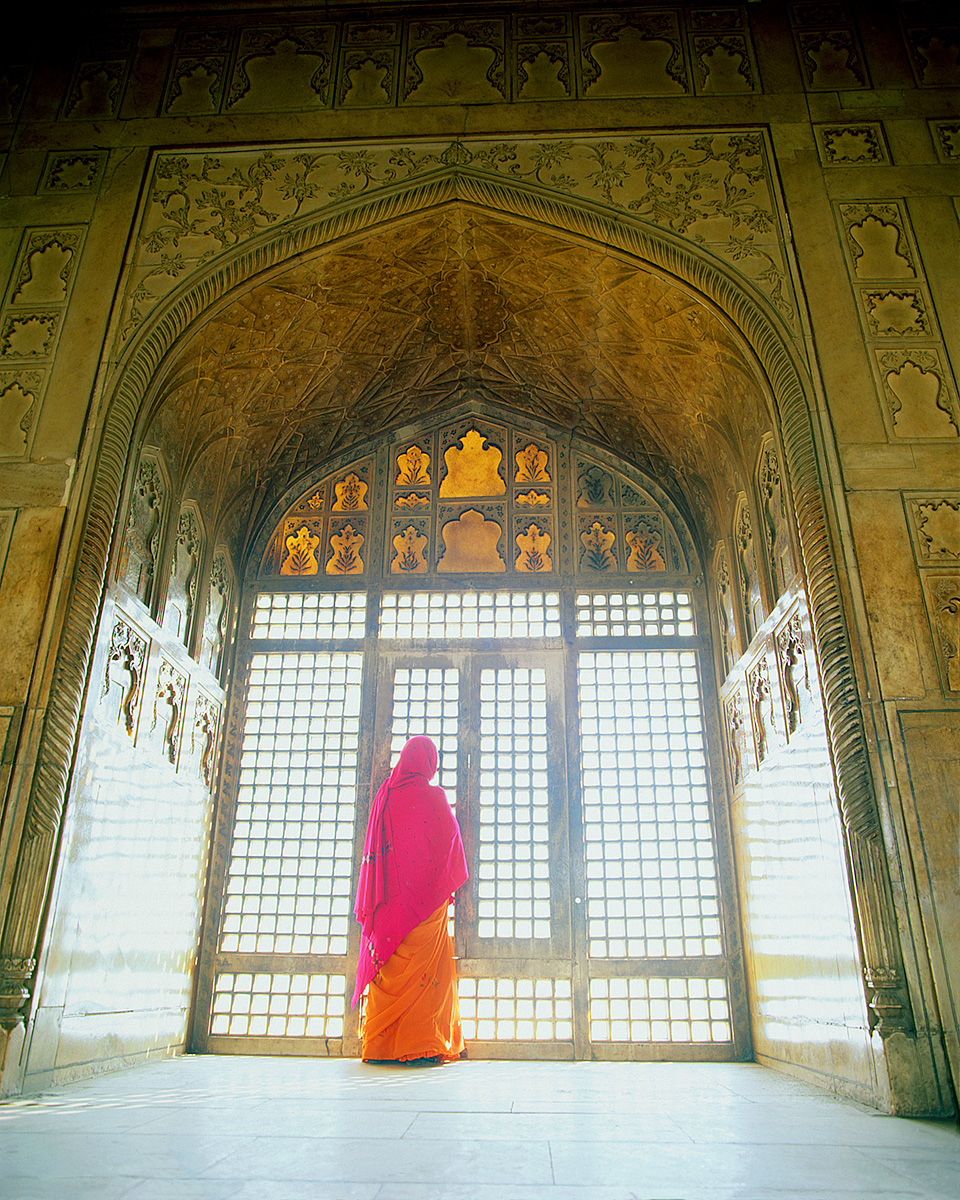 Image 5
Shooting in Fog
Thick fog blankets a scene and, because it is lighter than middle gray, will cause your meter to give you a reading that makes the fog look middle gray and underexposes the scene. Using the spot function in a handheld meter may not be accurate, simply because if the fog is thick enough, even nearby objects will be enshrouded in minute airborne water particles that reflect light and thwart a meter’s accuracy.
Instead, I use the incident metering mode to measure ambient light. When the soft light strikes the white dome on the meter, the incident mode will give you the most accurate reading possible. It is not influenced by the reflectance of the fog, as you can see in image 6.
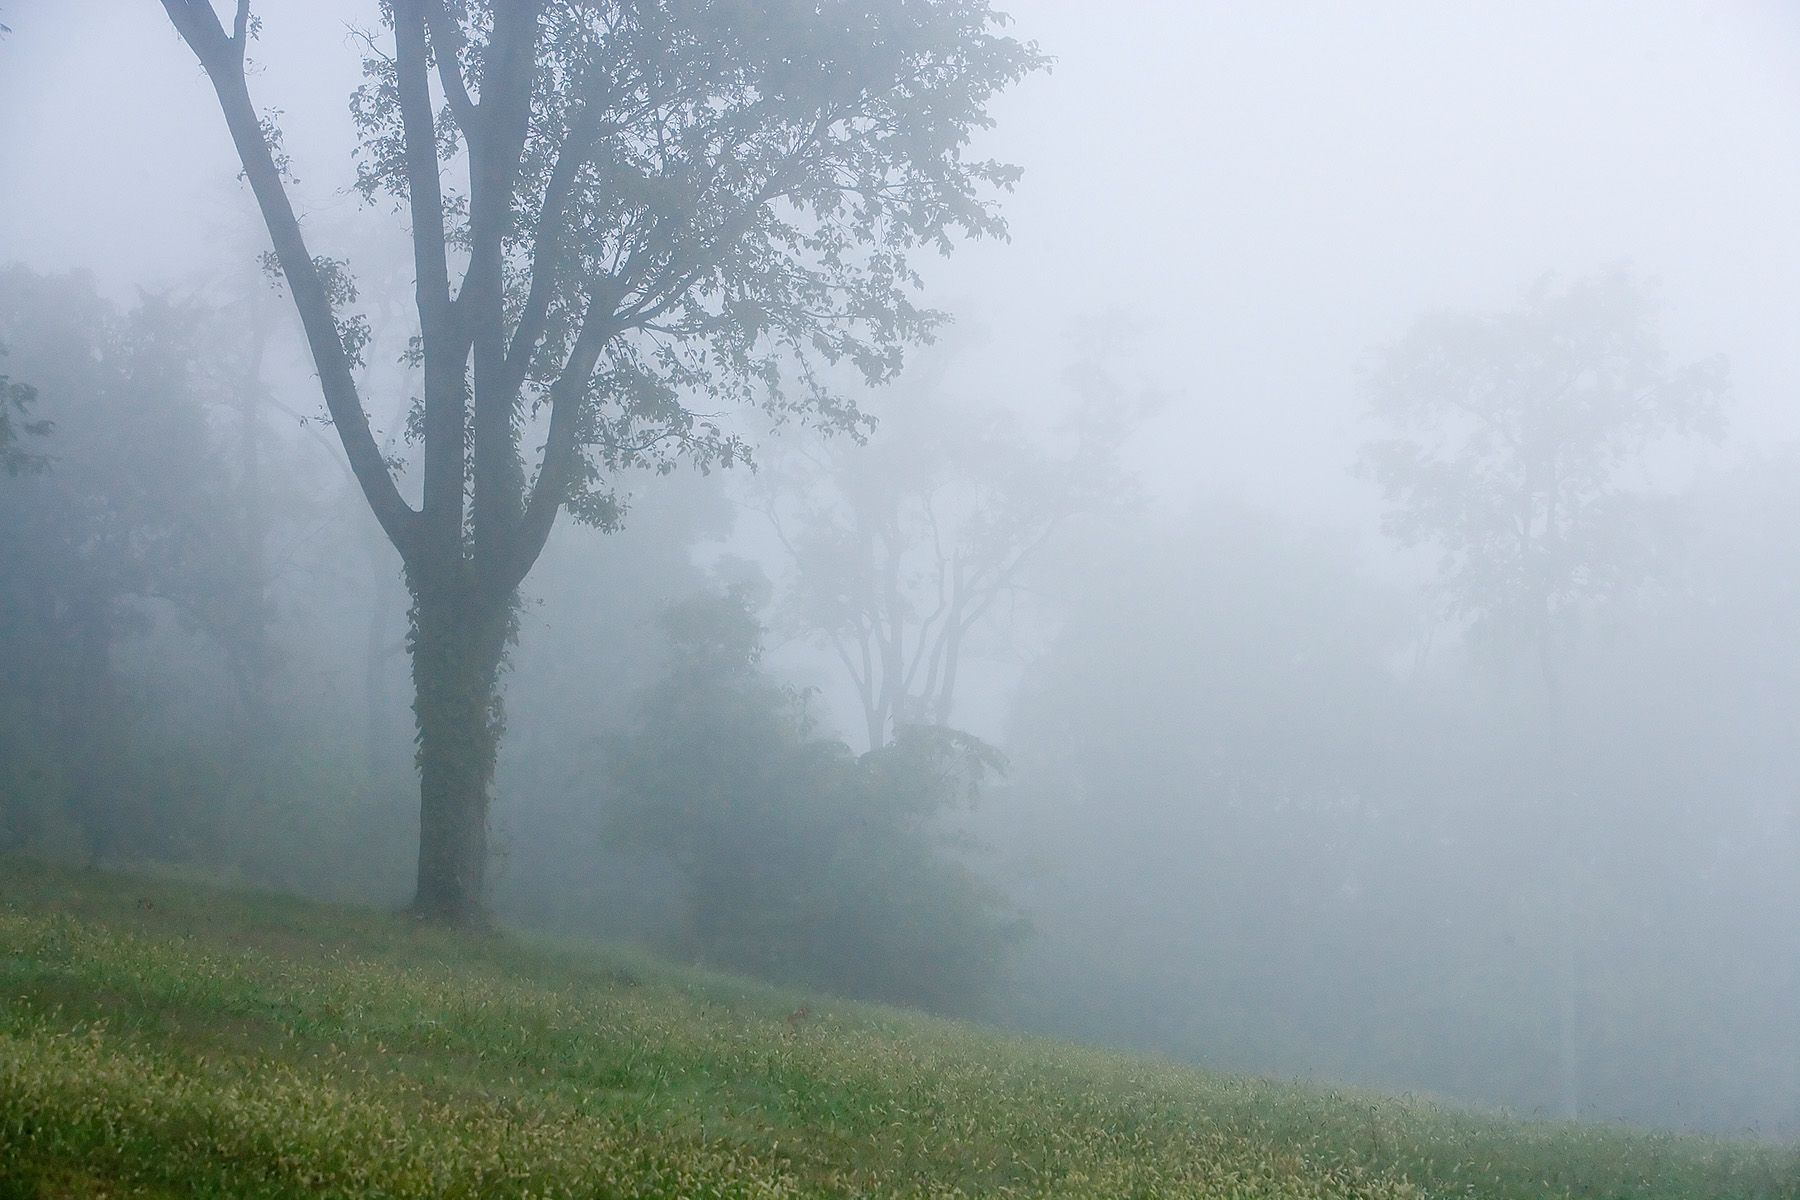 Image 6
Shooting in Snow
Snow presents a more challenging situation than fog. If the composition is primarily white, the camera’s built-in meter will underexpose the picture by a least one full f-stop and probably more, depending on how the sun is striking the snow and how much of the frame is filled with white. The photo I took in Yosemite, image 7, has areas that are dark, but about 80% of it is white. This kind of shot would typically be underexposed by 1 1/3 f-stops.

Image 7
I used a Sekonic meter to read the light on this scene, and just as with shooting in fog, I used the incident mode on the meter. The picture was taken when I shot film, and you can see that without any manipulation at all the exposure is perfect. The dome on the meter must face the camera lens when you’re taking an incident reading, and it must be in the same light as the scene. In other words, don’t stand in the shade of a tree and read the light. Stand under the open sky that illuminates the scene you’re capturing.
Alternatively, you can sew onto your photo backpack or photo vest a piece of middle-gray fabric. Using the spot mode function on the meter, you can read the light reflected from the fabric and, assuming the fabric is in the same light as the scene before you, the light reading will be accurate.
Flash Reflected by a Shiny Surface
A common problem with exposure when using flash is that the brilliant burst of light is reflected by shiny materials like glass, varnished wood, chrome, plastic, or marble. The reflection is so bright that an in-camera meter underexposes the picture. It’s similar to what happens if you take a reading while the camera is aimed at the sun. In my portrait of a woman in Morocco, image 8, the mosaic tile reflected the flash. This brilliant highlight would definitely have affected the meter reading. Obviously, for artistic purposes, it would have been better to move the flash off-camera, but my point is to show the kind of intense reflection that will cause underexposure unless you recognize the problem.

Image 8
To obtain a correct exposure, I didn’t use the automatic meter in my camera or the auto sensor in the flash. Instead, I used my Sekonic meter on flash mode. With its white dome facing the camera lens, I held the meter in front of the model (the distance from the meter to the flash must be the same as the distance from the subject to the flash). I had a friend push the test button on the flash (I could also have used the self-timer), and the immediate readout on the meter’s LCD gave me the correct lens aperture for a perfect exposure. In this way, I completely circumvented the problem of the unwanted reflection influencing the meter.
Extreme Contrast
Camera meters don’t understand extreme contrast—brilliant highlights and dark shadows in the same picture. Whether or not you will get a good exposure is a crapshoot with the odds against you. You may conclude that the meter will average the two extremes of exposure and produce a viable image, but it’s not possible to know that for sure. It depends on the percentage of dark areas versus light areas, what tones are in the center of the composition, what exposure mode you are using, and if you happen to be lucky at that moment.
The picture of a flute player in Cusco, Peru, image 9, provides an example of what I mean by extreme contrast. The bright mid-day sun was reflecting on a white wall, pushing the highlights to the edge of acceptability. In some parts of the dark shadows—they didn’t look this dark to my eyes, of course—detail has been completely lost. How can a built-in camera meter expose for this correctly? The only way would be to use spot mode and walk over to the man’s hat to take a reading. Since these meters read 3% to 5% of the viewfinder, taking the reading from the shooting position would mean that you’d include more than the hat. That isn’t a narrow enough angle to be as specific as you need to get a correct exposure. Using a handheld meter with 1-degree spot capability is the answer, and that’s what I did. I took a light reading from where I was kneeling and got an exposure that is perfect.
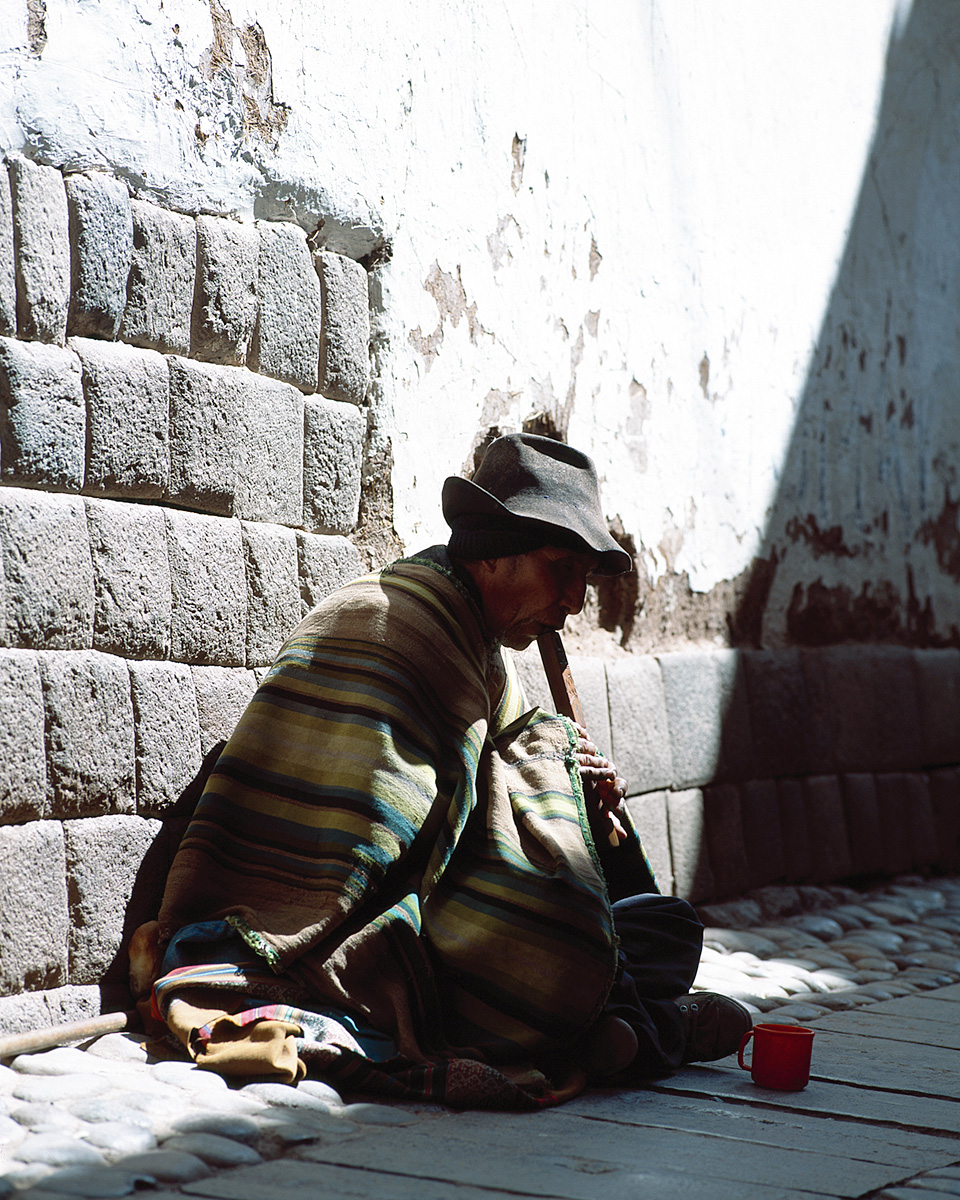 Image 9
An Additional Tip: Don’t Shoot in JPEG Mode
This isn’t a metering mistake per se, but shooting in JPEG mode, as opposed to raw mode, will create problems for you that look like exposure issues. JPEG files are compressed, and they are much smaller than raw files. That’s why you can get many more JPEG images on a memory card. However, in order to make files smaller, the JPEG format discards a lot of information (pixels). The pixels that are thrown away first are the ones that create subtle differences in tonality in the highlights and shadows. The result is that the tones that are required to reveal texture and detail are missing. Highlights get blown out and appear grossly overexposed, while shadows that originally had detail go black.
Compare photos image 10 and image 11. I took this portrait in both JPEG and raw at the same time, and you can see in the JPEG version (image 10) some of the highlights have lost texture and detail. This is the last thing you want. Even though the light was soft and diffused, and even though the exposure is correct, the JPEG file couldn’t hold enough detail in the highlights.
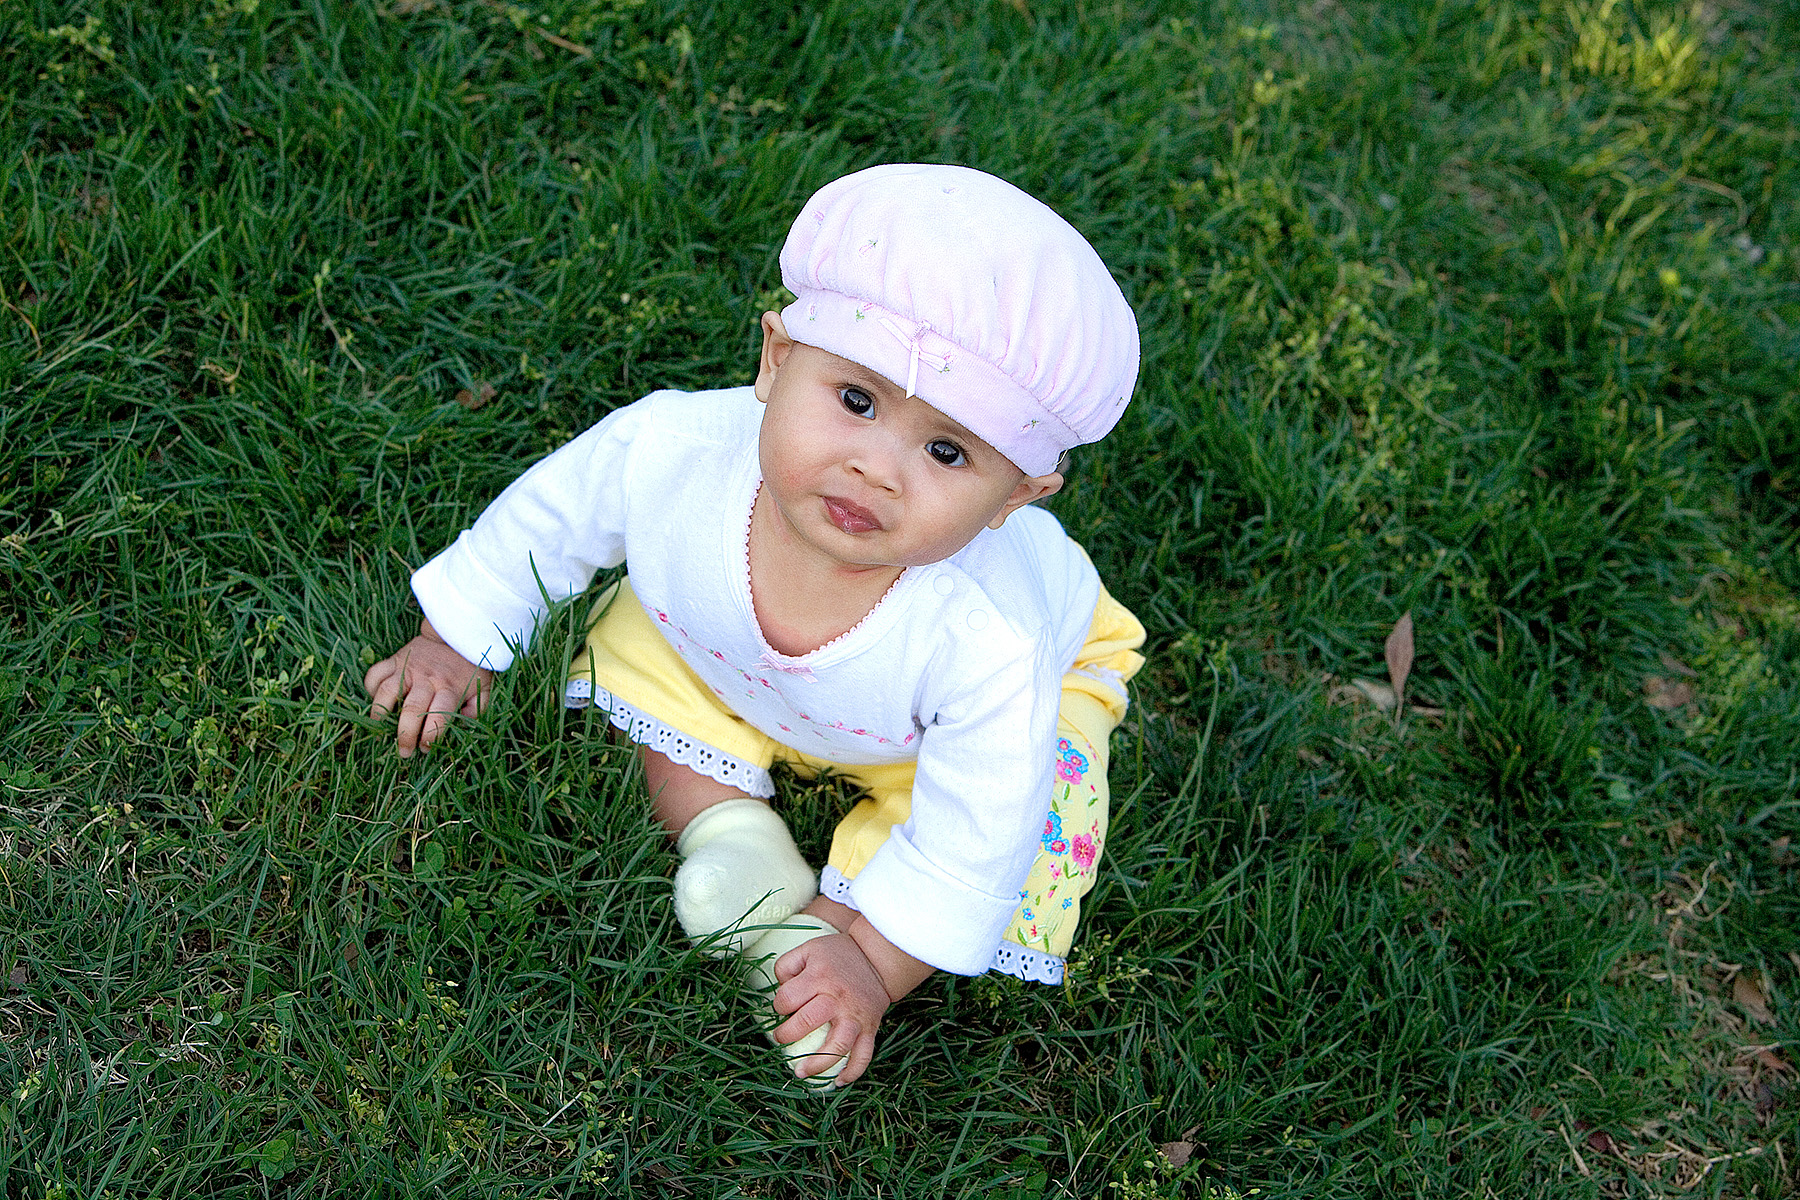
Image 10
 Image 11
Visit Jim online to see his work, online courses, photo workshops, photo tours, and more!
All text and images in this article are © Jim Zuckerman.