Metering for Large Format Film
In this article from our Professional Photographers on Light Metering series, Guy Rhodes shares his metering techniques and explains why it's essential to use a handheld meter for his 4x5 film images.
When I decided to roll back the clock and dive into 4x5 film photography, one of the first things on my gear list was a handheld light meter. After all, the Graflex Crown Graphic camera I decided on, with all its beautiful simplicity, was devoid of this necessary tool for determining exposure. Sure, I could guess (sunny 16 rule) and compensate for exposure errors during printing, but the technical perfectionist in me wouldn't let this fly.
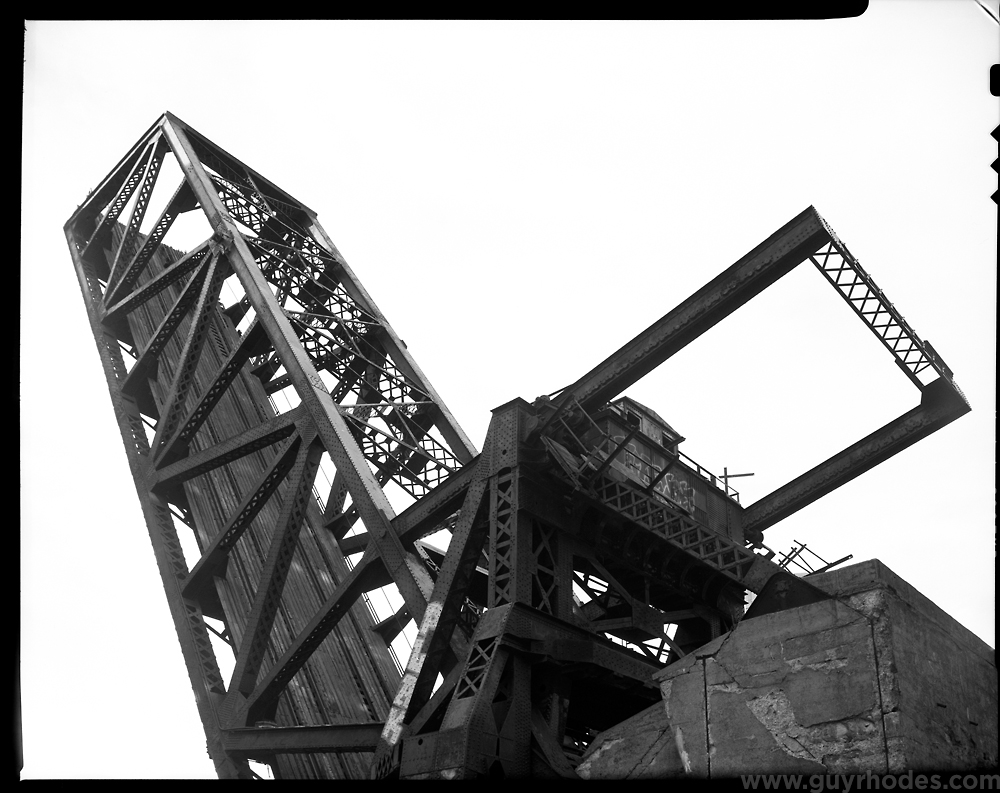
Spot metering with the Sekonic L-758Cine light meter helped preserve details in this truss bridge when shooting against a bright sky on 4x5 film.
The Sekonic L-758Cine light meter, in addition to supporting some other features for my live stage lighting work, was the perfect choice to use in conjunction with large format film. It features both a spot meter (used to measure light reflected off distant objects or specific things) and an incident meter (used to measure light falling on a subject you can physically access, or the ambient light in a given area where you're standing).
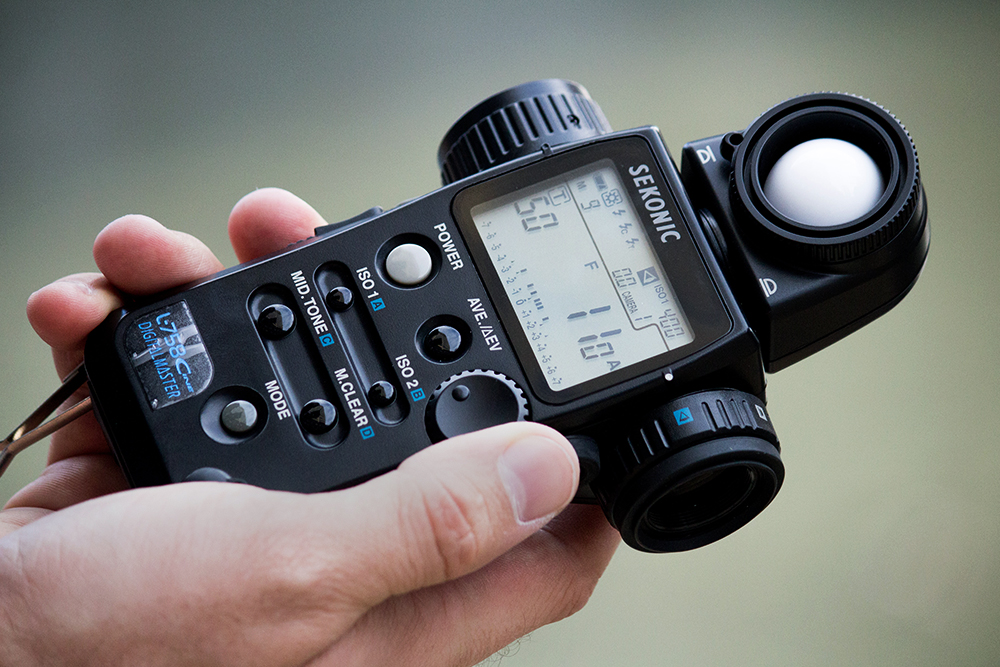
Here, we can see that I've recorded several readings into the Sekonic L-758Cine's memory, shown as "M 9" near the left side of the display. The average of those readings (my final exposure for the bridge image at the top of this article) is shown on the display.
One great thing about the L-758Cine is its averaging function, which is critical to the way I use the spot meter when shooting 4x5 film. My averaging method is a bastardization of the Zone System, as well as the way an evaluative meter would work in a DSLR. It might not be a "correct technique" by any stretch, but it works for me.
After composing my image in the camera, I verify that the meter is set to the ISO I am rating my film at, and is in the correct mode (spot instead of incident). I look through the spot meter's viewfinder and take multiple readings around the scene, storing each one in the meter's memory using the (you guessed it) memory button.
I try to meter a variety of tones in the scene, weighting my readings more heavily in the areas I want to see detail in. For example, I won't put four readings of a bright sky into the averaging mix when I know I want to see detail in the side of a building that is in the shadows.
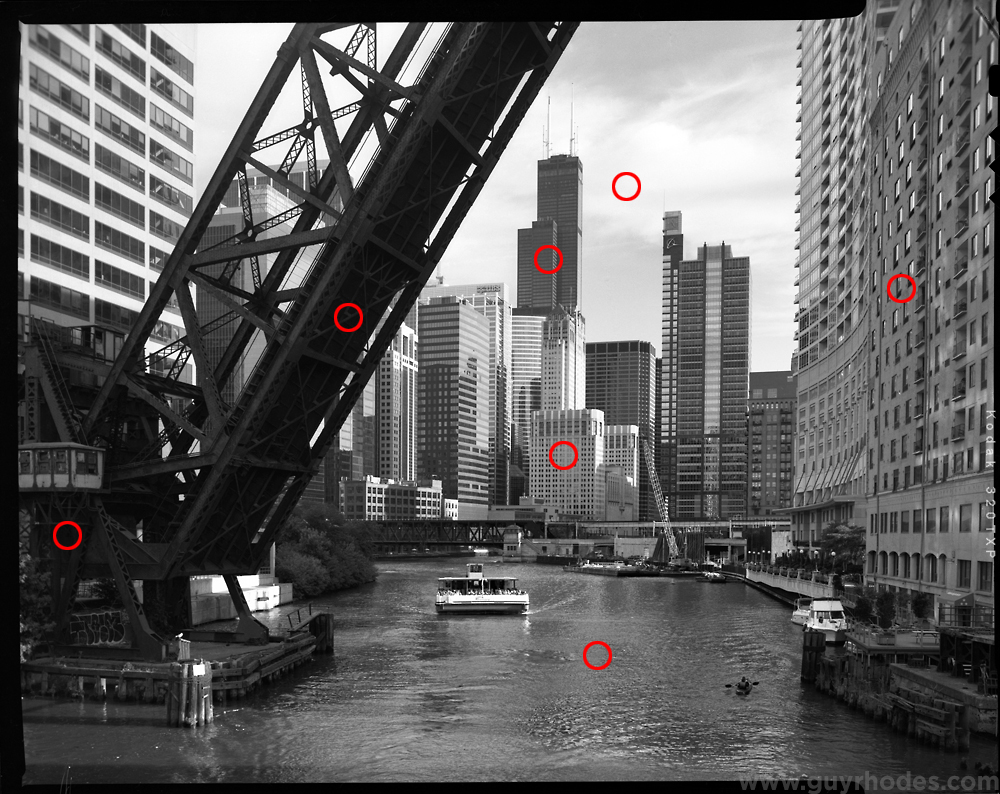
The red circles on this image represent where I took and stored spot meter readings with the Sekonic L-758Cine. You can see that I purposely took more readings in the dark areas and midtones of the scene to preserve details there, taking only one reading in the bright sky. The final, averaged exposure for this image was f/22, 1/25 second @ ISO 400.
After taking and storing my readings, sometimes as many as ten, I press the meter's average button (AVE./EV) to see an averaged exposure reading from all the spots I metered. Sometimes, I'll compare this with one incident light reading from wherever I'm standing (if I'm in similar light), then make an exposure choice appropriate for my film stock. So far, this method has brought me flawless exposures.
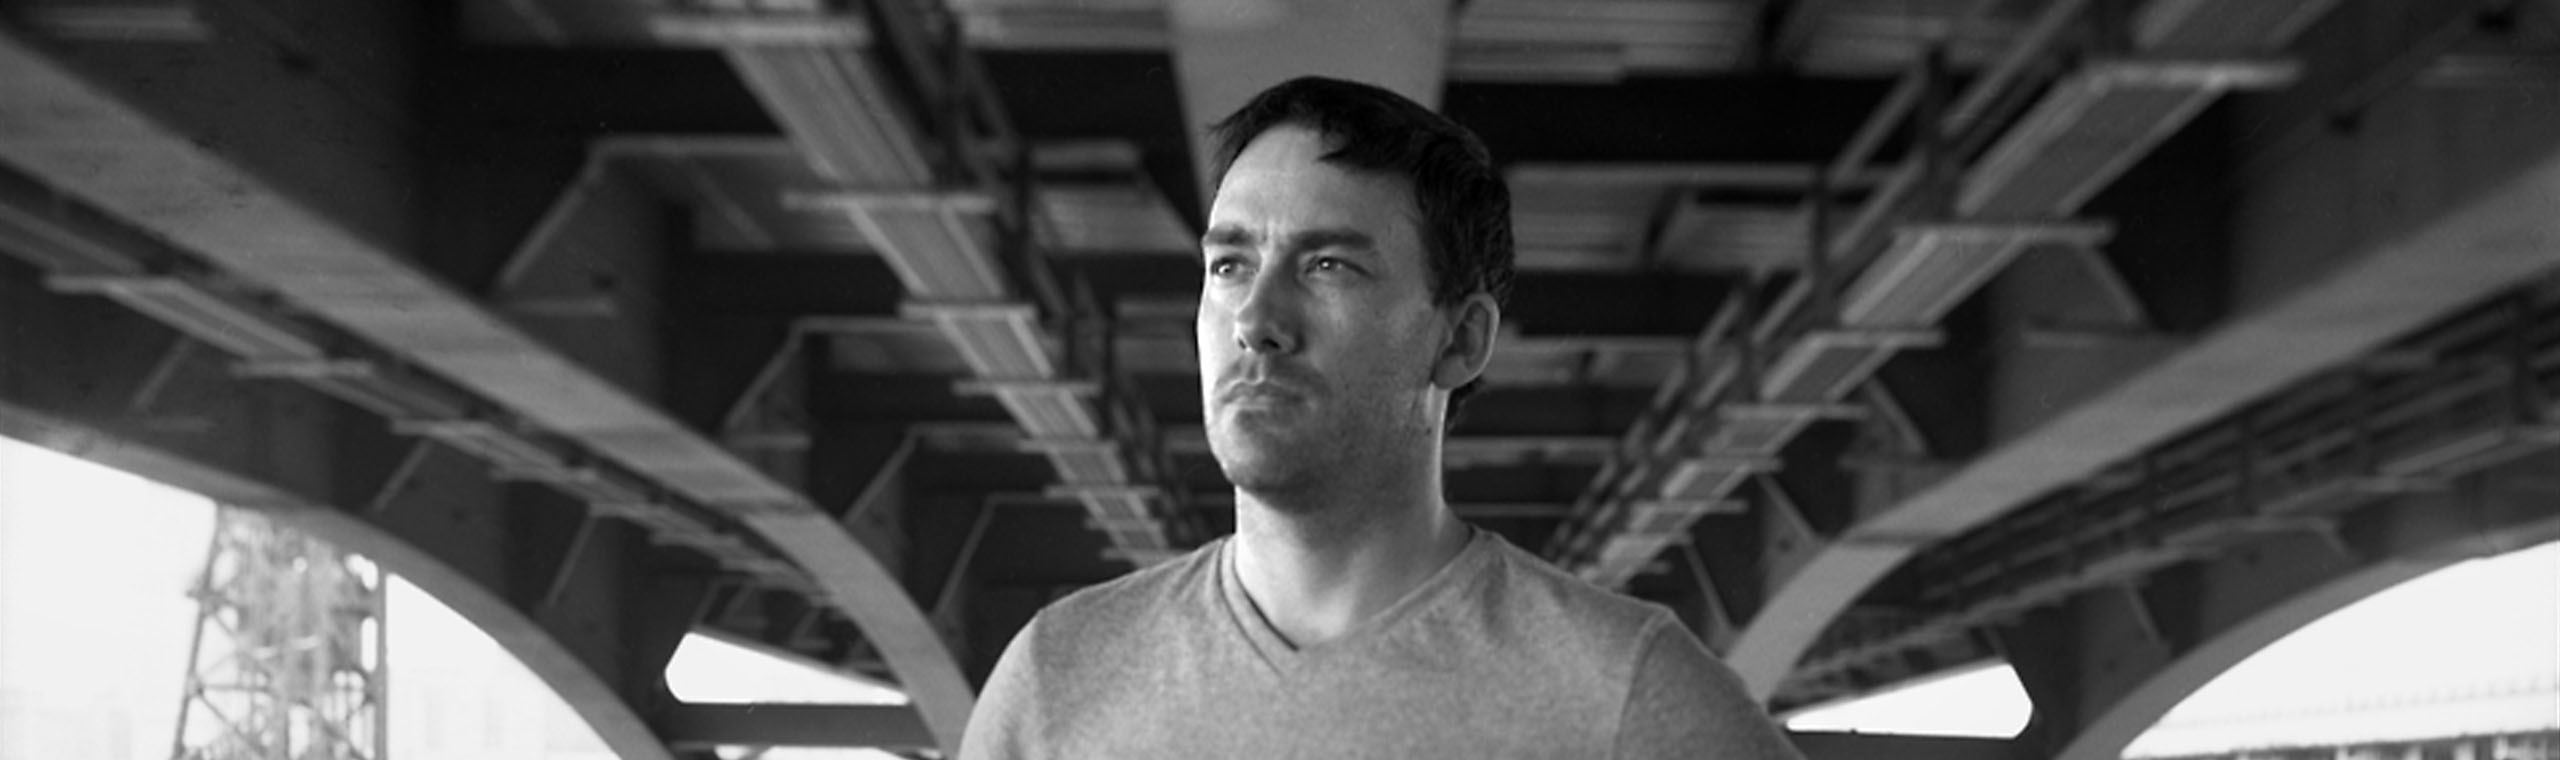
There have been times, however, when my evaluative averaging spot method wouldn't have worked too well. A portrait I did comes to mind. My subject was standing under a bridge on an overcast day, with the bright cityscape surrounding him. Had I used the spot meter, most of my readings would have probably ended up on the bright cityscape, and my subject in the shadows would have been underexposed. This situation made incident metering the preferred mode to use. That’s generally the case when you can easily walk out and touch your subject.
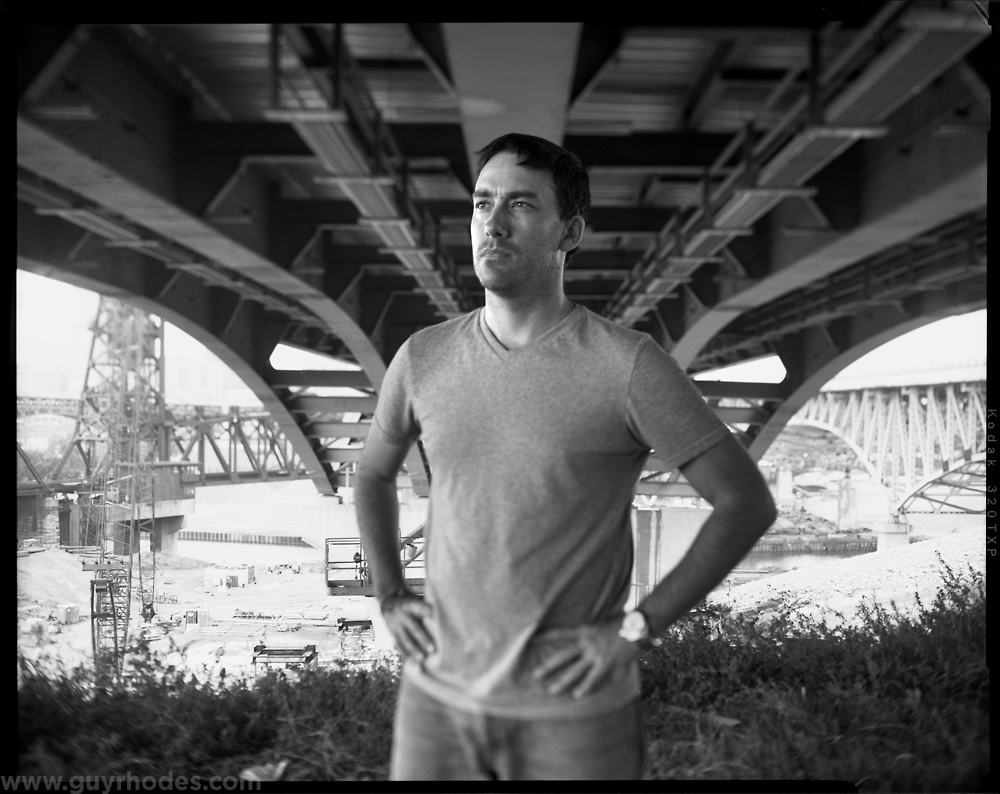
This scene wasn't appropriate for spot meter averaging, since my subject was in shadow with a very bright background. Instead, I took one incident reading under the subject's chin. Incident readings are preferable whenever you can physically walk up to the subject you're going to photograph.
To meter this image, I extended the L-758Cine's lumisphere (that's the little white dome on the top of the meter that sees the light) and took a reading just under my subject's chin, with the lumisphere facing the camera. Some folks place the lumisphere just in front of the subject's nose, but I find that sticking things directly in my subjects' faces can add to their nervousness, especially if we're still "breaking the ice." Under-the-chin readings work perfectly for me, and have always resulted in perfect exposures for my subject.
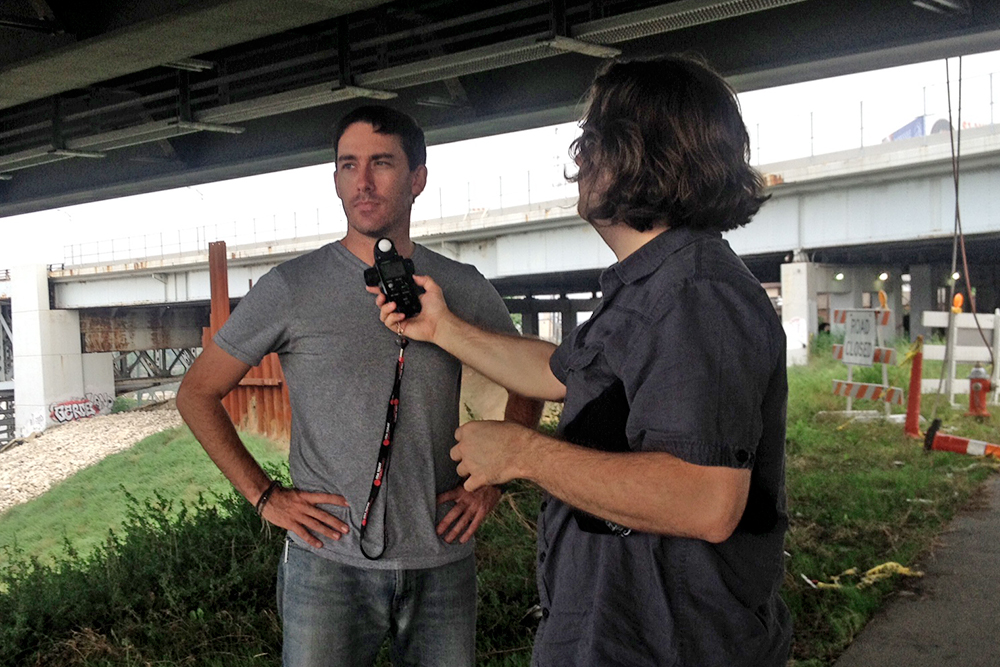
Taking the incident reading under the subject's chin, which I've found is more comfortable for the subject than sticking the meter in their face for the more traditional tip-of-the-nose method. The final exposure for this scene was f/11, 1/10 second @ ISO 400.
Developing trust in a piece of equipment often takes time. When I started using the Sekonic L-758Cine with 4x5 film, I'd take a Canon DSLR out into the field strictly to have another point of reference for exposure. That quickly fell by the wayside, however, when I realized how accurate the Sekonic meter was. The L-758Cine meter is now a trusted part of my gear bag that I just don't feel right shooting without. For my 4x5 film work, it is essential.
Guy Rhodes is a photographer, filmmaker, and lighting designer based in East Chicago, IN. You can see more of his work on his website.
Read more from Guy Rhodes and other working pros in our Professional Photographers on Light Metering series: