One Set, Multiple Looks

Photographer Ab Sesay explains how to use a single lighting setup to achieve multiple looks, allowing you to expand your creative options while staying within your budget and on schedule.
Have you ever been asked by a client, “Are we only shooting on a white background?” Sometimes this means a client is asking for different sets, while at other times a client simply doesn’t want all the images looking the same. I will walk you through the setup of four different lighting schematics that give you and your clients the benefit of multiple looks, all while utilizing just one set.
Equipment List
First let's discuss the light shapers used, why they were used, and some alternatives that will give you varied results.
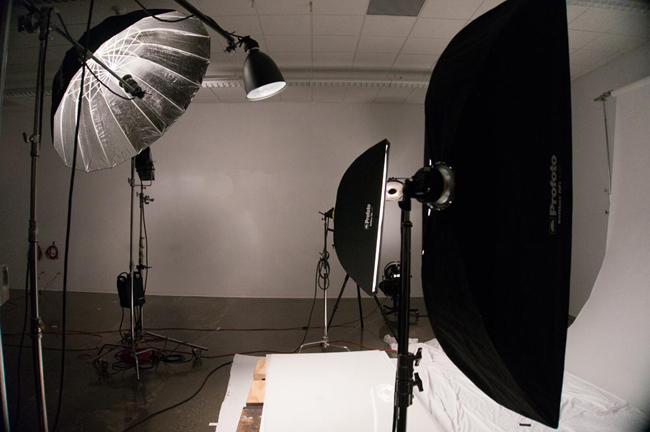
- Light modifiers: one Profoto Telezoom Reflector, one Profoto Umbrella XL, and two Profoto RFi 1x6' Softboxes
- Main Light (option one): Profoto Telezoom Reflector. This reflector's deep bell produces a hard, contrasty light that has a very limited spread due to its depth. The Profoto Telezoom Reflector is also very efficient, as 100% of its light goes exactly where you want it with no spill. At a power of only 18ws you achieve an aperture of f/9.0. This allows you to maximize both recycling speed and flash duration, without sacrificing power.
- Main Light (option two): Profoto Umbrella XL. This is a good option if you want to open the model's face up a bit more, while giving the model a larger area to move around in. The parabolic nature of this umbrella gives you a large light source that is directional and still helps to keep light spill off the background. It also allows the model to move her chin both up and down, without her eyes falling into harsh shadows like the ones you might get with the Telezoom Reflector if the model's chin isn’t positioned just so. In addition, the Profoto Umbrella XL accentuates the eyes more so that your images become more about the person than the wardrobe.
- Background Light: Profoto RFi 1x6' Softboxes. These softboxes make great background lights when you have only two heads and are working in relatively confined spaces. Setting them about 13 feet from the background allows them to have a nice even spread.
Louis Pasteur once said that luck favors the prepared. I choose my tools according to how well prepared they will make me, and a light meter is an invaluable tool to help me stay "lucky." You may ask, "Do I really need a light meter for these lighting setups?" Yes and no. Some cooks use measuring cups and timers so their recipes taste reliably the same all the time. Other cooks add a pinch of this or a dollop of that, and the results vary each time they cook the same dish. You need to have formulas that you know work for two main reasons: First, because that allows you to set up quickly and nail your lighting, especially if you don’t have a stand-in for your model to work with at the time. Second, it allows you to communicate well with assistants, letting them know exactly how and where you need lights set up, and what relative power levels they should be set to.
The Shots
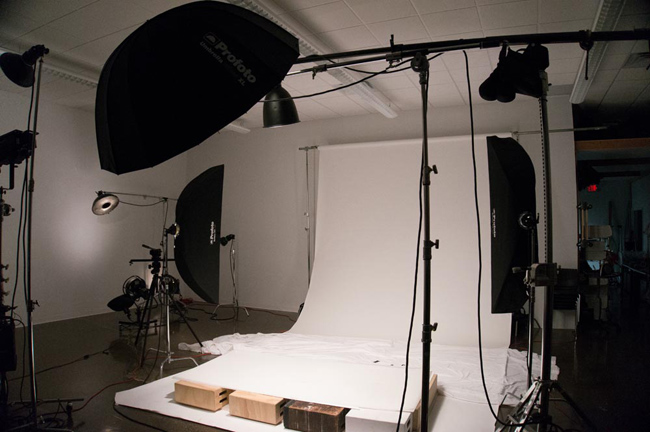
Now let's discuss the setup for each shot, along with some pros and cons. To begin with, here is a diagram of the basic setup:
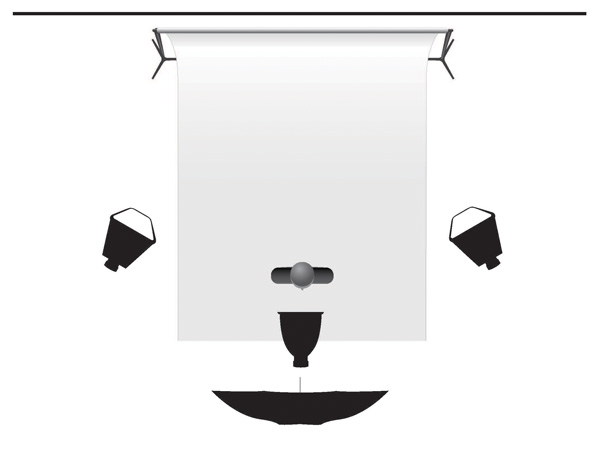
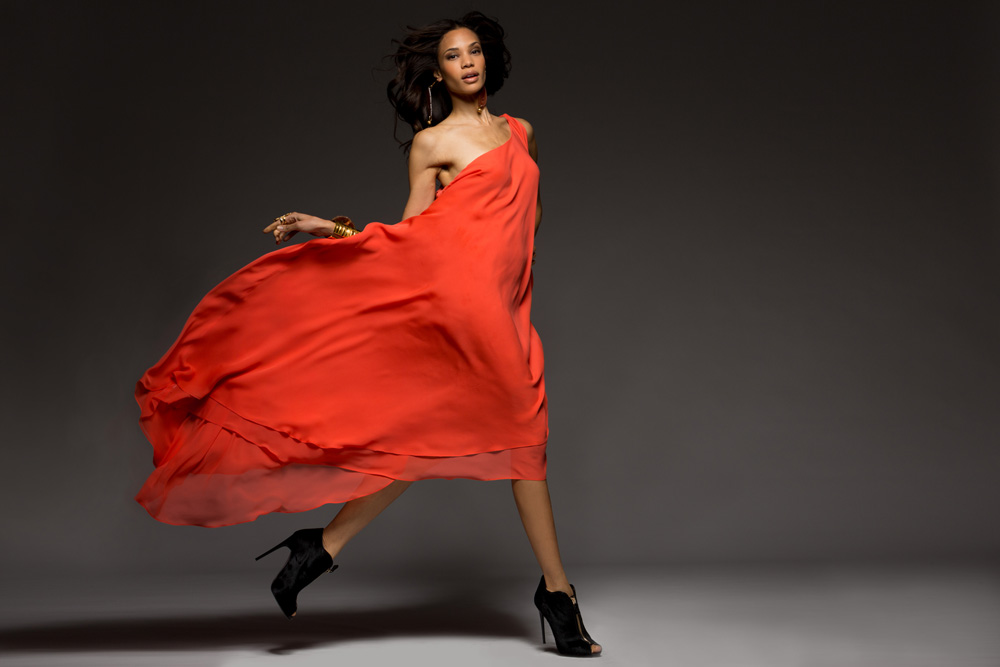
Shot One (top of the page): The model was positioned about 15 feet from the white background. The Profoto Telezoom Reflector was about 3 feet in front of the model and raised on a boom 10 feet high. When metering this setup, I pointed the dome up toward the camera for f/9. I also tilted the meter up 45 degrees toward the light to match the position of the model’s head to get f/11. This let me know that when the model's head was tilted upward I would get some areas that were slightly overexposed. My camera held enough detail that this difference didn’t worry me.
Pros: I love simply lit (single light source) shots. The efficiency of the Profoto Telezoom Reflector allows for ultra-fast recycling.
Cons: The model had to be instructed to stay within the light. If the model had been too far to the left or right, or if her head had been tilted down, I would have ended up with undesirable results.
Shot Two (above): The model was again positioned about 15 feet from the white background. The Umbrella XL Silver Reflector was about 5 feet in front of the model, and the center was boomed to about 9 feet off the ground. I used the Profoto Umbrella XL Silver because it’s a larger, thus much softer, light source given the distance to my subject, yet still very directionally focused. While not as dramatic as the Profoto Telezoom Reflector, this umbrella’s light gave the model much more freedom to move and leap without her being overly concerned about staying in the light.
Pros: Big sweet spot. Freedom of movement for subjects, especially when photographing a personality you don't want to overly concern about staying on a mark. The efficiency of the Profoto Umbrella XL allowed me to get f/10 while using only 75ws. The umbrella’s large size is impressive to clients, it allows you to add a diffuser, and it can be swapped out for a white or translucent version. Since it weighs only 2.6 pounds, you can boom it out using lighter grip equipment.
Cons: The Umbrella XL is about 5 feet in diameter and difficult to use in really tight spaces.
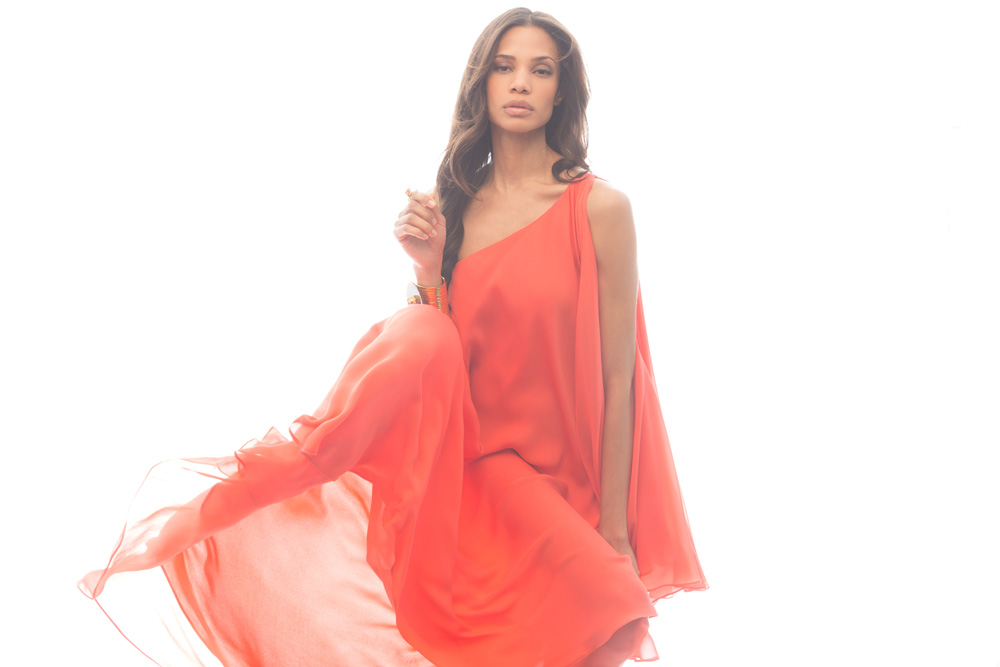
Shot Three (above): The model was again positioned about 15 feet from the white background, but this time she stood on a stage constructed of 4x8-foot white Plexiglas sitting on top of a layer white foamcore and apple boxes. The white foamcore under the plexi eliminated any show-through and helped protect the underside of the plexi. The use of the stage also gave me a seamless edge because the light from the background reflected onto it gave a seamless look. The stage also raised the model just enough that the shadows created by the background lights on the paper were hidden. The plexi had the additional benefit of not marking as easily as seamless paper.
The two Profoto RFi 1x6' softboxes were set about 15 feet apart and 13 feet from the background, and provided the indirect lighting for this shot. The background was metered to f/14 and all the light reflected from the background wrapped around the model, bounced off the walls and ceiling, and I'm sure bounced back a bit from the Profoto Umbrella XL too. I metered the front of the model and got f/2.8. I changed my ISO to 400 and closed down to f/5.6 to get a little more depth of field. Ultimately, the background was a little over four and a half f-stops brighter than what my exposure was set to.
Note: With all the light coming from the background, you will need a light to help you focus with this setup.
Pros: Easy to set up anywhere you have a white wall. Easy to achieve with speedlights or large studio strobes. Creates a very soft, flattering light that eliminates most blemishes, and gives your model a lot of freedom to move about the set.
Cons: Not very efficient. Requires a lot of power; you will likely still need to increase your ISO. You also lose a huge amount of contrast, color fidelity, and edge detail on fine fibers.

Shot Four (above): The model was still on the stage. My goal for the background was to retain paper white with no light wrapping around the model. The background was metered at f/14, and my main light, the Profoto Telezoom Reflector, was set to f/9. The background was overexposed one stop. This gave a nice, clean white while not burning out the model’s hair or fringing the edges. If you experienced this happening with a model who has extremely light hair, you could take another one third stop off the background and still get the same effect.
Pros: Having the light one stop overexposed gave a nicer reflection off the white plexi that the model was standing on, and still appeared seamless for any full length shots.
Cons: Using the Telezoom Reflector in this manner does give the model a limited amount of space to move within, but you do always have the option of just turning on the Umbrella XL Silver.
In conclusion, this four-light setup allows you to use the lights independently of each other or together to achieve many different looks. The meter plays a key role by letting you easily dial in exactly where you need to be based on these previously tested recipes. Most important, you can creatively switch looks by simply turning lights on and off, all while your subject remains warmed up and in the flow.
Let's say on average you take a shot every five seconds. This affords you 24 shots in two minutes. Each of these lighting changes takes about 15 seconds. So, in under 10 minutes you could have four different lighting looks and close to 100 shots of your subject. Your client will get the variety requested and see the difference between working with you and with other photographers, and if your client wants you to do the same thing a few months down the line, all you have to do is dial in your recipe.